
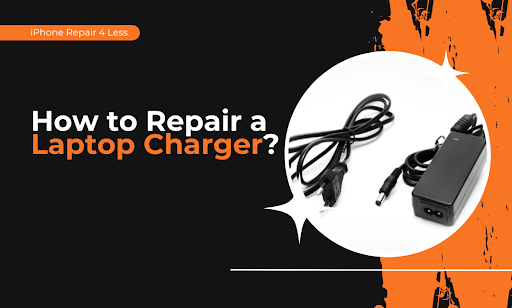
That laptop charger you’re about to toss? Stop. Most “dead” chargers have simple fixes that take minutes, not money. We’ve watched people throw away $60 chargers when a $2 fix would’ve done the trick.
Your charger probably isn’t broken — it’s just crying for help. Whether it’s a frayed cable, a wonky connection, or mysterious charging issues, you can fix it yourself today.
Here’s what you’ll learn:
- How to diagnose your exact charger problem in 30 seconds
- The electrical tape trick that saves 80% of frayed cables
- Why your charging port might be the real culprit (and the toothpick solution)
- When to splice wires like a pro (with zero experience)
- The one time you actually need a new charger
We fix laptops daily at iPhone Repair 4 Less in Lafayette. Most charging issues? They’re DIY-friendly. But if you need backup, we’ve got your back with same-day repairs.
How to Diagnose Your Exact Charger Problem in 30 Seconds
Your charger’s acting up, but which part is actually broken? Most people guess wrong and waste money on the wrong fix. Here’s your 30-second diagnostic checklist.
The Wiggle Test (10 seconds)
Plug in your charger and wiggle the cable at three spots:
- Where it meets the power brick
- At the laptop connection point
- Along any visible wear spots
If your charging light flickers during wiggling, you’ve found your problem zone. Mark it with tape — that’s where you’ll focus your repair.
The Swap Test (15 seconds)
Got another laptop around? Try your charger on it. Works fine? Your laptop’s charging port is the issue, not the charger. No dice? The charger’s definitely the culprit.
The Visual Check (5 seconds) Look for these dead giveaways:
- Exposed wires (copper showing through)
- Melted plastic near connections
- Bent pins in the connector
- Burn marks on the power brick
Found exposed wires? That’s actually good news — it’s the easiest fix. We see these daily at iPhone Repair 4 Less, and they take about 5 minutes to repair.
Pro tip: Your charging light tells stories. Steady amber means it’s charging slowly (usually a cable issue). Flashing or no light? That’s typically a connection problem. Green light, but the battery won’t charge? Your battery might be the real villain here.
The Electrical Tape Trick That Saves 80% of Frayed Cables
The repair hack’ll make you feel like a tech genius: electrical tape. Seriously, this $3 roll has saved more chargers than any fancy repair kit.
Why Electrical Tape Works
Unlike regular tape, electrical tape:
- Insulates exposed wires (prevents shorts)
- Stretches to create tight seals
- Handles heat without melting
- Flexes with your cable movement
The 5-Minute Fix
- Clean the damaged area — Wipe with rubbing alcohol
- Straighten the wires — No crossing or touching
- Start wrapping 1 inch before damage — This anchors your repair
- Overlap each wrap by 50% — No gaps allowed
- Extend 1 inch past damage — Seal both ends tight
Wrap it like you mean it. Three layers minimum. The goal? Make it thicker than the original cable at that spot. This prevents future bending and breaking.
When Tape Won’t Cut It
Skip the tape if you see:
- Multiple breaks along the cable
- Damage inside the connector housing
- Melted or burned sections
- Wires completely severed
These need proper splicing or replacement. Our Lafayette repair shop handles these trickier fixes, but honestly? If you can wrap a present, you can probably tape-fix your charger.
The “Strain Relief” Upgrade
After taping, add a pen spring over the repaired area. Just coil it around the cable. This spreads out bending forces and makes your fix last months instead of weeks. Old pen out of ink? Perfect donor for your spring.
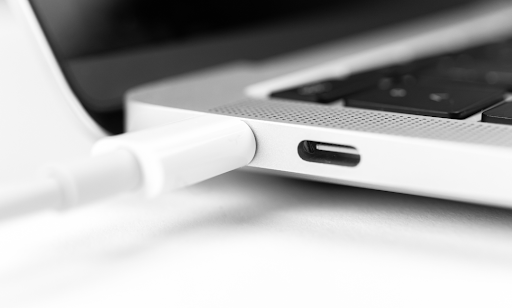
Why Your Charging Port Might Be the Real Culprit (and the Toothpick Solution)
Plot twist: Your “broken” charger might be perfectly fine. Most of the charging issues stem from gunked-up ports, not bad chargers. Before you splice any wires, try this zero-risk fix.
The Pocket Lint Problem Nobody Talks About
Your laptop lives in bags, on desks, near coffee cups. Every day, microscopic debris camps out in your charging port. Eventually? Your charger can’t make proper contact. The connection gets flaky, and you blame the charger.
Signs your port’s the problem:
- The charger feels loose when plugged in
- You need to prop it at weird angles
- Connection works… sometimes
- Other chargers also act wonky
The 2-Minute Toothpick Fix
What you’ll need:
- Wooden toothpick (plastic works too)
- Compressed air (optional but helpful)
- Good lighting or a phone flashlight
The cleaning process:
- Power down completely — Unplug everything first
- Shine a light inside — You’ll probably see fuzz
- Gently scrape with a toothpick — Work from back to front
- Blow out debris — Short bursts of air
- Test your charger — Often works immediately
Be gentle. You’re not mining for gold — just clearing the path. The gunk usually comes out in satisfying clumps. At iPhone Repair 4 Less, we’ve seen ports packed with everything from pet hair to mystery crumbs.
Warning: Metal tools are a hard no. One slip and you’ll bend the pins. Stick with wood or plastic.
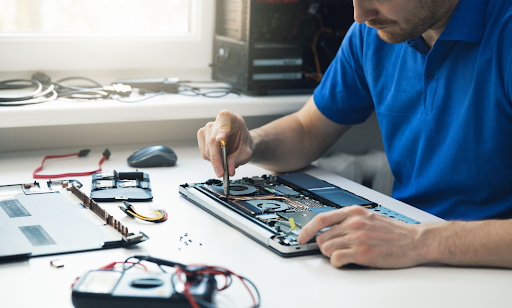
When to Splice Wires Like a Pro (With Zero Experience)
Cable’s completely severed? Time to channel your inner electrician. Don’t panic — splicing sounds scarier than it is. If you can twist a bread tie, you can splice wires.
Your Shopping List ($10 Total)
- Wire strippers (or careful knife work)
- Electrical tape
- Heat shrink tubing (optional but pro-level)
- Lighter or hair dryer
The “Even Your Kids Could Do This” Splice Method
Here’s the step-by-step process:
Step 1: Prep the patient
Cut the cable cleanly at the break. Strip about 1 inch of outer insulation from both ends. You’ll see multiple wires inside — usually white, black, and sometimes a ground wire.
Step 2: Match your pairs
- White to white
- Black to black
- Shield/ground to shield/ground
Can’t tell colors apart? The thicker wire is usually positive (connects to the center pin).
Step 3: The twist technique
- Spread wire strands slightly
- Push ends together so strands intermesh
- Twist clockwise 5-6 times firmly
- Fold the twisted section back along the wire
This creates a connection stronger than the original wire. No soldering required.
Making It Last
- Individual wire wrapping: Tape each wire separately first. This prevents shorts if your main wrap fails.
- The overlap rule: When wrapping all wires together, overlap tape by half its width. No gaps = no problems.
- Heat shrink upgrade: Slide the tubing on before connecting the wires. After taping, heat it for a professional, permanent seal.
The One Time You Actually Need a New Charger
Some chargers are beyond saving. Here’s when to stop DIY-ing and start shopping.
The “It’s Dead, Jim” Checklist
- Power brick won’t light up at all (internal failure)
- Burning smell from adapter (fire hazard — stop using immediately)
- Voltage tester shows inconsistent output (damages laptops)
- Multiple break points along the cable
- Connector pins are bent/broken beyond repair
- Melted plastic anywhere on the unit
Smart Shopping (Without Getting Ripped Off)
- OEM vs. aftermarket: Original chargers cost 3x more but last longer. Aftermarket works for backup chargers. Just check the wattage matches.
- The wattage rule: Your replacement needs equal or higher wattage. 65W laptop? A 65W or 90W charger works. 45W charger? That’s asking for trouble.
- Universal adapters: Great for multi-laptop households. Get one with multiple tips. Usually runs $30-40 versus $60+ for brand-specific chargers.
When Professional Repair Makes Sense
Sometimes paying for repair beats buying new:
- Charger’s under warranty
- It’s a high-wattage gaming laptop charger ($100+)
- You need it fixed TODAY
Our Lafayette repair team fixes chargers while you wait. It usually takes 20 minutes and costs half what a new charger would cost. We’ll even check your laptop’s charging port for free — because sometimes that’s the real problem.
Why Choose iPhone Repair 4 Less
Not every charger deserves the DIY treatment. When your laptop’s your lifeline — for work, school, or that Netflix binge — you need it fixed right and fixed fast.
We Fix More Than iPhones (Despite Our Name)
Yeah, we know. “iPhone Repair 4 Less” doesn’t scream “laptop experts.” But here’s the thing: we’ve been fixing all Apple products since 2010. MacBooks, iPads, and yes, their temperamental chargers too. Our techs have seen every charging issue imaginable.
What sets us apart:
- Diagnosis while you wait — Know your exact issue in minutes
- No fix, no fee — If we can’t repair it, you pay nothing
- 1-year warranty on repairs — We stand behind our work
- Same-day service — Most repairs done in under 30 minutes
Real Repair vs. Band-Aid Fixes
We’ll be straight with you. Sometimes that $15 electrical tape fix is all you need. We’ll tell you that. But when you need:
- Port replacement (those tiny pins are tricky)
- Internal power brick repair
- Professional splicing for expensive chargers
- Safety checks on questionable damage
That’s when professional repair makes sense. We’ve saved customers hundreds by fixing $120 gaming laptop chargers that seemed “totally dead.”
Located in Lafayette, we serve the entire area — Eunice, Opelousas, New Iberia, and beyond. Bring us any charging issue, any brand. We’ll either fix it fast or tell you honestly if replacement’s your better bet.
Ready to Get Your Laptop Charging Again with iPhone Repair 4 Less?
You’ve got the knowledge to tackle most charger problems yourself. From the wiggle test to wire splicing, these fixes work. Save that $50+ and feel like a repair genius while you’re at it.
Your repair roadmap:
- Diagnose first — wiggle, swap, and visual check
- Try the toothpick port cleaning before anything else
- Electrical tape fixes 80% of cable damage
- Splice wires when breaks are clean and simple
- Replace only when you smell burning or see multiple failures
But when DIY isn’t cutting it? iPhone Repair 4 Less handles the tricky stuff. Whether it’s your MacBook charger, Dell adapter, or any laptop power issue — we’ve got you covered. Walk in with a dead charger, walk out powered up. No appointment needed, just swing by Monday through Saturday.
Write a Comment