
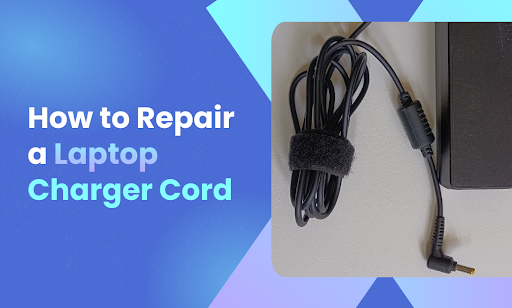
That frayed wire near the charging brick isn’t just annoying. It’s a ticking clock. One day it works, the next day your laptop’s dead and you’re scrambling for a replacement. But here’s the thing: most charger damage is fixable without spending $50-$100 on a new adapter.
In this guide, you’ll learn:
- Why laptop charger cords fray and break
- DIY repair methods for damaged wires
- Tools you’ll need for a safe fix
- When to repair vs. when to replace
- Safety precautions to avoid electrical hazards
And if your laptop itself needs professional attention, iPhone Repair 4 Less in Lafayette handles laptop repairs too. Our techs can diagnose charging issues fast and get you back up and running.
Why Laptop Charger Cords Fray and Break
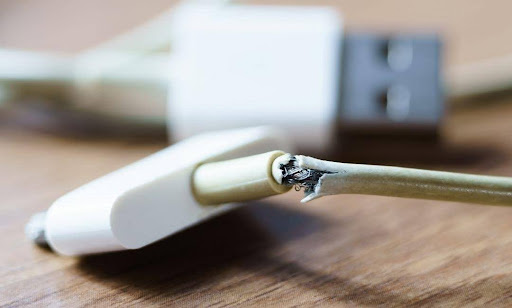
Your charger cord takes more abuse than you realize. Regular use stresses the material, especially at the connector ends where the cable bends frequently. Over time, this continuous bending leads to fraying and exposes the wires within.
But bending isn’t the only culprit.
Common Causes of Charger Damage
| Cause | What Happens |
| Repeated bending | Weakens internal wires at stress points |
| Improper storage | Tight wrapping creates kinks and breaks |
| Yanking the cord | Damages connectors and internal wiring |
| Pet chewing | Pets mistake cords for toys or teething relief |
| Poor manufacturing | Cheap third-party chargers use low-quality materials |
The Weak Points
Most damage happens in two spots:
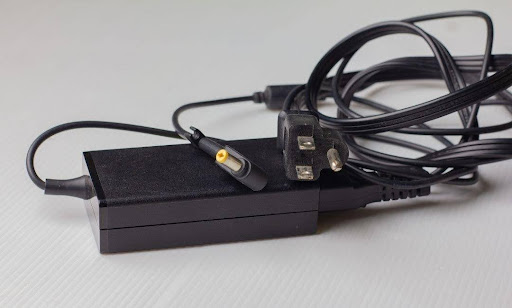
- Near the charging brick where the thin cord meets the adapter
- At the laptop connector where constant plugging and unplugging stresses the joint
Many users report the same frustration: the cable frays exactly where the skinny cord meets the brick. That’s the weak link.
Why This Matters
A frayed cord isn’t just ugly. Sparks and other problems can occur as the frayed wires touch and create reactions. It can also make it impossible for your laptop to charge properly.
Pro Tip: If you notice your charger getting warm in one spot or your laptop charging intermittently, inspect the cord immediately. These are early warning signs of internal damage.
If your laptop has charging issues beyond a damaged cord, the problem might be internal. The technicians at iPhone Repair 4 Less diagnose laptop charging problems and can pinpoint whether it’s your cord, port, or battery causing the trouble.
DIY Repair Methods for Damaged Wires
Got a frayed cord? You have options. The right method depends on how bad the damage is and your comfort level with basic repairs.
Method 1: The Electrical Tape Fix
This is the quickest solution for minor fraying where wires are exposed but not broken.
- Unplug the charger from the wall and your laptop
- Clean the damaged area of any debris
- Wrap each internal wire separately with electrical tape
- Add a second layer around the entire section
- Test by plugging in and gently moving the cable
Pro Tip: Avoid duct tape. It’s not designed for electrical insulation and can melt under heat.
Method 2: Heat Shrink Tubing Repair
For a cleaner, more durable fix:
- Slide the tubing over the cord before you start repairs
- Position it over the damaged section
- Apply heat with a hair dryer or heat gun until it shrinks snugly
- The tubing creates a protective barrier that moves with the cable
Method 3: Soldering for Broken Wires
When wires are completely severed, soldering reconnects them properly.
- Cut away the damaged section cleanly
- Strip about 1/2 inch of insulation from each wire end
- Twist matching wires together tightly
- Apply solder to create a solid connection
- Insulate each wire individually, then cover with heat shrink tubing
This method requires more skill but creates the strongest repair.
Tools You’ll Need for a Safe Fix
Before you start, gather everything. Stopping mid-repair to hunt for supplies leads to shortcuts and mistakes.
Essential Tools
| Tool | Purpose |
| Wire strippers | Remove insulation without damaging internal wires |
| Electrical tape | Insulate exposed wires |
| Heat shrink tubing | Create durable, flexible protection |
| Soldering iron + solder | Reconnect severed wires |
| Heat gun or hair dryer | Shrink tubing into place |
| Multimeter | Test connections after repair |
| Utility knife | Cut through the outer cable sheathing |
Nice to Have
- Helping hands/clamps for holding wires steady while soldering
- Safety glasses to protect your eyes from solder splatter
- Rubber gloves for insulation when testing
Invest in quality tools. A cheap soldering iron with poor temperature control can damage thin charger wires or create weak joints that fail within weeks.
When to Repair vs. When to Replace
Not every damaged charger deserves a second chance. Sometimes replacement is the smarter move.
Repair When:
- The damage is limited to one small section
- Only the outer insulation is frayed
- You can clearly see and access the problem area
- The power brick itself works fine
- You have the tools and basic skills to do it safely
Replace When:
- Multiple sections of the cord show damage
- The charger gets unusually hot during use
- You notice a burning smell or see scorch marks
- The power brick makes crackling or buzzing sounds
- Sparks appear when you plug it in
- The connector pins are bent or broken
- You’ve already repaired it once before
The Cost Factor
OEM laptop chargers typically run $50 to $100. Third-party options cost less but come with risks. A botched repair or cheap replacement can damage your laptop’s battery or motherboard, turning a $60 problem into a $300+ headache.
When in doubt, get a professional opinion. The team at iPhone Repair 4 Less works on laptops daily and can tell you whether your charger is worth saving or if replacement makes more sense. They’ll give you an honest assessment without charging for the diagnosis.
Safety Precautions to Avoid Electrical Hazards
Charger repairs involve electricity. Respect it.
Before You Start
- Unplug everything. Disconnect from both the wall outlet and your laptop
- Wait 5 minutes for any residual charge to dissipate
- Work in a well-lit, dry area away from water sources
- Keep a fire extinguisher nearby when soldering
During the Repair
- Never cut into a cord while it’s plugged in
- Insulate each internal wire separately before wrapping the whole section
- Keep soldering iron contact brief to avoid melting surrounding insulation
- Test connections with a multimeter before plugging into your laptop
Warning Signs to Stop Immediately
If you encounter any of these, stop the repair and replace the charger:
- Burn marks on the cord or brick
- Melted plastic anywhere on the charger
- Unusual smells coming from the power adapter
- Visible damage to the AC side (wall plug end)
The AC vs. DC Risk
Here’s something most people don’t realize: the cord between your wall outlet and the power brick carries AC current at a higher voltage. Damage here is far more dangerous than damage on the DC side (the cord that plugs into your laptop). If your AC cord is damaged, replace the charger entirely. Don’t attempt a repair.
The bottom line? A repaired charger that fails can fry your laptop’s internals or, worse, start a fire. If you’re not 100% confident in your repair skills, bring it to a pro. iPhone Repair 4 Less handles laptop repairs and can replace faulty charging components safely, often while you wait.
Keep Your Laptop Powered with iPhone Repair 4 Less
A frayed charger cord doesn’t have to mean a new charger. With the right tools and a bit of patience, you can fix minor damage yourself and extend your adapter’s life. Just know your limits and prioritize safety over savings.
Key takeaways:
- Most charger damage happens near the brick or laptop connector due to repeated bending
- Electrical tape works for minor fraying; soldering handles severed wires
- Always unplug both ends before starting any repair
- Replace the charger if you see burn marks, smell burning, or hear crackling
- Never attempt repairs on the AC (wall plug) side of the cord
When DIY isn’t enough, iPhone Repair 4 Less in Lafayette has your back. Our technicians diagnose laptop charging issues quickly and can determine if the problem is your cord, port, or battery. No fix, no fee.
Write a Comment