
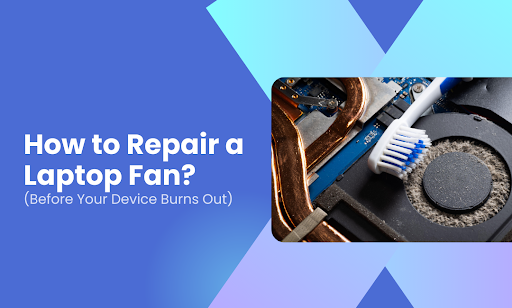
Your laptop sounds like a jet engine. It’s hot enough to fry an egg on. And it just shut down mid-project. A failing fan is one of the most common laptop problems, and ignoring it can fry your motherboard, GPU, or CPU faster than you’d think.
This guide walks you through everything you need to know:
- Why your laptop fan stopped working
- How to diagnose the problem yourself
- Step-by-step instructions to clean or replace the fan
- Tools you’ll need for a safe repair
- Signs it’s time to call a professional
And if you’d rather skip the DIY route, iPhone Repair 4 Less in Lafayette, LA, handles laptop fan repairs daily. Most fixes are done while you wait, and you won’t pay a dime if they can’t fix it.
Why Your Laptop Fan Stopped Working
A dead laptop fan is rarely random. Something caused it, and identifying that something is half the battle. Here are the most common culprits.
Dust and Debris Buildup
This is the number one offender. Over time, dust, pet hair, and lint accumulate inside your laptop’s vents and around the fan blades. That buildup restricts airflow and forces the fan to work harder until it eventually gives out.
Pro tip: Cleaning your fan every 3-6 months can prevent this entirely.
Worn-Out Fan Motor
Fans are mechanical parts. They wear down. If your laptop is several years old and the fan has been spinning nonstop through heavy workloads, the motor may simply be burned out. You’ll usually notice a grinding or clicking noise before it dies completely.
Software or BIOS Settings
Sometimes the fan isn’t broken at all. It’s been turned off. Windows Power Saver mode can disable the fan to conserve energy, and certain BIOS configurations can do the same. Always check these before cracking open the case:
- Power plan settings in Windows (switch to Balanced or High Performance)
- BIOS fan controls (press F2, F10, or DEL during startup)
- Manufacturer software like ASUS Armoury Crate or Lenovo Vantage
Dried-Out Thermal Paste
The thermal paste between your CPU and heat sink helps transfer heat efficiently. When it dries up, your laptop overheats fast, and the fan can shut down to protect itself from further damage.
Motherboard or Power Issues
If the motherboard’s fan connector is faulty, the fan won’t receive power. A bad battery or charger can also starve the fan of the energy it needs. These issues typically require a professional diagnosis.
Not sure which problem you’re dealing with? The team at iPhone Repair 4 Less can run a free diagnostic on your laptop and pinpoint the issue. No fix, no fee.
How to Diagnose the Problem Yourself
Before you grab a screwdriver, figure out what you’re actually dealing with. A quick diagnosis can save you time, money, and the headache of opening your laptop for no reason.
The Listen-and-Feel Test
This one takes about 30 seconds. Turn on your laptop and run something demanding like a YouTube video in 4K or a graphics-heavy app. Then do two things:
- Put your ear close to the fan vents. A healthy fan hums quietly. Grinding, clicking, or total silence all point to a problem.
- Hold your hand near the exhaust vent. You should feel warm air pushing out. No airflow means the fan either isn’t spinning or is too clogged to move air.
Check Your Software Settings
Sometimes the fan is fine. Your settings just need adjusting.
- Open Task Manager (Ctrl + Alt + Delete on Windows) and sort by CPU usage. A rogue app hogging 80%+ of your processor can make the fan work overtime or trigger thermal shutdowns.
- Check your power plan. Windows Power Saver mode can reduce or disable fan speed. Switch to Balanced or High Performance and see if that changes anything.
- Look at your manufacturer’s software (like ASUS Armoury Crate, Lenovo Vantage, or Dell Power Manager). Fan controls sometimes get toggled off during updates.
Use Monitoring Software
Free tools like HWMonitor, SpeedFan, or Core Temp give you real-time data on fan RPM and CPU temperature. If your CPU is running above 80°C at idle and the fan RPM reads zero, you’ve confirmed a hardware issue.
Pro tip: If your laptop throws a 90B error at startup (common on HP models), that’s your machine flat-out telling you the fan has failed.
Still not sure what’s wrong? iPhone Repair 4 Less offers free diagnostics on laptops. Our team can pinpoint the exact issue in minutes, no guesswork required.
How to Clean or Replace the Fan
You’ve diagnosed the problem. Now it’s time to fix it. We’ll cover both cleaning (for clogged fans) and full replacement (for dead ones).
What You’ll Need
| Tool | Purpose |
| Phillips or Torx screwdriver | Opening the laptop case |
| Compressed air can | Blowing out dust and debris |
| Soft brush or cotton swabs | Cleaning fan blades and tight spots |
| Isopropyl alcohol (90%+) | Removing stubborn grime |
| Anti-static wrist strap | Preventing static damage to components |
| Replacement fan (if needed) | Sourced from Amazon, eBay, or the manufacturer |
Cleaning a Clogged Fan
If your fan still spins but sounds like it’s struggling, a deep clean might be all you need.
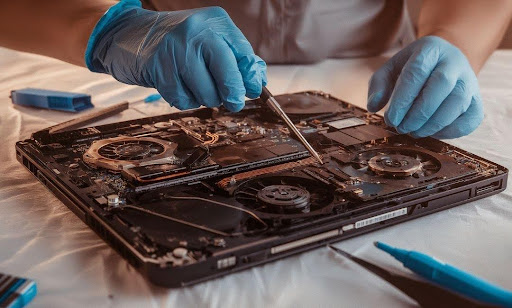
- Power down completely. Shut off the laptop, unplug it, and remove the battery if it’s removable. Hold the power button for 5 seconds to drain residual charge.
- Remove the back panel. Unscrew the bottom cover with your screwdriver. Keep screws organized because they’re often different sizes.
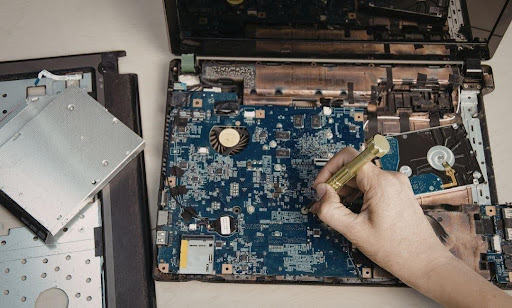
- Locate the fan. It’s typically near the CPU, connected to the motherboard by a small cable. You’ll see the exhaust vent leading out of the laptop.
- Hold the fan blades still. This is critical. If compressed air spins the fan freely, it can damage the motor. Use a toothpick or your finger to keep the blades in place.
- Blast the dust. Use short, controlled bursts of compressed air on the fan blades, heat sink fins, and the surrounding area. Work from multiple angles.
- Scrub stubborn buildup. Dip a cotton swab in isopropyl alcohol and gently clean the blades and heat sink.
- Reassemble and test. Put everything back together, power on, and listen. The difference should be noticeable immediately.
Pro tip: Clean your fan every 3-6 months. If you have pets or live in a dusty environment, bump that up to every 2 months.
Replacing a Dead Fan
If the fan doesn’t spin at all and cleaning didn’t help, it’s time for a swap.
- Find the right replacement. Search your laptop’s exact model number + “replacement fan” on Amazon or eBay. Compatibility matters here. A wrong fan won’t fit, and it could cause more problems.
- Follow steps 1-3 above to open the laptop and locate the fan.
- Disconnect the fan cable from the motherboard. It’s usually a small, delicate connector. Pull it gently and straight out.
- Unscrew the old fan from its mounting bracket and carefully remove it.
- Install the new fan. Place it in the same position, secure the screws, and reconnect the cable to the motherboard.
- Reassemble, power on, and test. Run a demanding app for 10-15 minutes and make sure the fan kicks in with no unusual sounds.
When to Skip the DIY Route
Not every repair belongs on your kitchen table. Consider calling a pro if:
- You’re not comfortable opening your laptop (no shame in that)
- The fan replacement requires removing the motherboard
- You suspect the issue is deeper, like a faulty motherboard connector or dried thermal paste
- Your laptop is still under warranty, since opening it yourself could void coverage
Tools You’ll Need for a Safe Repair
Using the wrong tools (or no tools at all) is the fastest way to turn a simple fan repair into a motherboard replacement. Here’s what to have on your workstation before you touch a single screw.
The Essentials
- Precision screwdriver set (Phillips #00 or #000, and Torx if your model requires it). Most laptop screws are tiny. A regular household screwdriver will strip them instantly.
- Compressed air can. Your best friend for blowing out dust without making contact with fragile components. Use short bursts only.
- Anti-static wrist strap. One static discharge can fry a motherboard. These cost under $10 and are worth every penny.
- Plastic spudger or pry tool. Never use a metal flathead to pop open your laptop’s back panel. You’ll scratch the casing or crack a clip.
Nice to Have
- Cotton swabs + isopropyl alcohol (90%+) for scrubbing stubborn grime off fan blades and heat sink fins
- Magnetic mat or small labeled containers to organize screws by location and size (they’re almost never uniform)
- Thermal paste if you plan to remove the heat sink during the repair. Once you lift it, the old paste needs to be cleaned and reapplied.
- Replacement fan sourced by searching your exact laptop model number on Amazon, eBay, or the manufacturer’s parts store
Before you start, search YouTube for a teardown video of your specific laptop model. Every brand has a different internal layout, and a 5-minute video can save you from a costly mistake.
Signs It’s Time to Call a Professional
DIY repairs are great for saving money. But some problems go deeper than a dusty fan or a loose cable. Here’s when you should put the screwdriver down and let someone with experience take over.
Your Laptop Still Overheats After Cleaning
You cleaned the fan, cleared every vent, and it still runs hot enough to cook on. That usually points to dried-out thermal paste between the CPU and heat sink, or a deeper issue with the cooling system’s heat pipes. Reapplying thermal paste requires removing the heat sink without damaging the processor, and that’s not beginner-friendly territory.
The Fan Spins but Makes Grinding Noises
A clean fan that still grinds or clicks has worn-out bearings. You can replace the fan yourself if you’re comfortable, but if the noise started after a drop or impact, the damage could extend to the heat sink mounting or motherboard connector.
You’re Getting Motherboard-Level Errors
If your laptop throws persistent fan errors at startup, shuts down within minutes of booting, or the fan connector on the motherboard looks scorched or bent, the problem has moved beyond the fan itself. Motherboard diagnostics require specialized tools and training.
Your Laptop Is Still Under Warranty
Opening the back panel on some models voids the warranty entirely. If your device is still covered, always check with the manufacturer before going the DIY route.
Keep Your Laptop Cool with iPhone Repair 4 Less
A noisy, overheating laptop doesn’t have to mean a trip to the recycling bin. Whether you grab a can of compressed air or swap the fan entirely, the fix is usually simpler than you think. Just don’t wait until your CPU pays the price.
Key takeaways
- Clean your fan every 3-6 months to prevent dust buildup
- Use free tools like HWMonitor or SpeedFan to diagnose fan issues before opening anything
- Always use an anti-static wrist strap and the right screwdriver set for safe repairs
- Replace dried thermal paste if cleaning alone doesn’t solve overheating
- Know your limits and call a pro when the problem goes beyond the fan
If DIY isn’t your thing, or the problem runs deeper than dust, iPhone Repair 4 Less in Lafayette, LA has you covered. Our team diagnoses laptop fan issues for free, fixes most problems while you wait, and backs every repair with a 1-year parts warranty. No fix, no fee. Call us at 337-255-2898.

Write a Comment